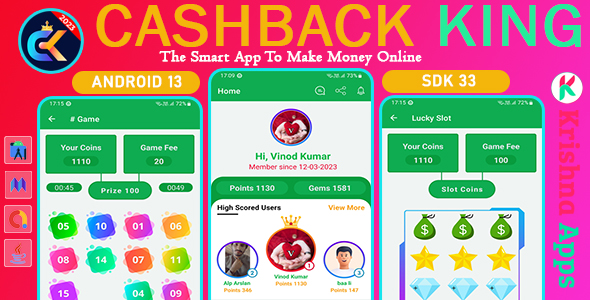
CashBack King is a Real Money Earning Android App Made in Android Studio With PHP Admin Panel, From PHP Admin Panel You Can Manage Your App And Website. In CashBack King App Users can play games, watch youtube videos, play Casino Slot Betting, send message to whatsapp with unsaved contacts and also get daily motivation quotes for free. This app also have top users leaderboard by earned coins vise. Users can share their unique referral link to earn more free coins and later they can convert these coins into Diamonds then diamonds can be redeem into real money in the app.
DOCUMENTATION
Important Requirement Admin Panel:
- PHP = 7.4
- allow_url_fopen Enabled
- short_open_tag Enabled
- cURL support Enabled
- PDO PHP Extension
- JSON PHP Extension
- Recommended Cloud Hosting For Fast Access to API and Smooth App Running
- Web Hosting – We Recommended Hosting From Hostinger, Get it Here – Coupon Code For 15% Discount: SPECIAL15
Important Requirements for Android App
- Android Studio Latest Version
- Android SDK Version: 33
- Gradle Version: 7.5
- AppLovin MAX Mediation Ads Account, Firebase, One Signal Notification, Play console to upload app on play store
- Install Android Studio ANd JDK as Per This Video https://youtu.be/S6U4uZJ15qg Otherwise Project Will Not Work.
- For YouTube Videos get YouTube API Key Here: https://youtu.be/mPqch2ufAHY
How to install Admin Panel?
Upload the admin-panel zip archive on your hosting or server using file manager, then extract zip file in your main domain or use a folder or subdomain. Some hosting subdomains may not work sometimes.
After that create a MySQL user and a database then import the database SQL file in your phpMyAdmin and make a connection to it on the file manager admin panel.
Go to file manager inside cPanel > open admin panel folder -> dashboard/include/connect.php and replace the database credentials with your database credentials.
As shown in the below image

Now login your admin panel: for example:
https://your-domain.com/dashboard/
Default login details:
email id: [email protected]
Password: admin
Now after enter in the admin panel go to sidebar menu -> Setting -> License Setting
And enter your license info from there:- Get Activation Key Here.
As shwon in the below screenshot:

Secret Key is the random combination of letters or alphabets, it should be same in admin panel and in the android studio.
And other info like package name, buyer name, email, license key will be filled accurately, otherwise your admin panel will work as a demo mode because of without activation.
Note:- After fillup all the details, you should logout from the admin panel, then login again
How to add server or admin URL in Android Studio app?
Follow below steps
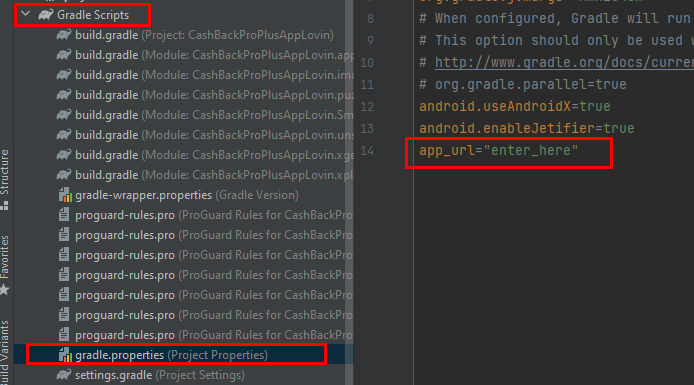
- Select Project in Android Studio > go to gradle Scripts> gradle.properties
- Open gradle.properties
- Now enter the encrypted domain url. Encrypt your url here: Click Here
As shown in the below image
How to Change App Name in Android Studio?
Open android studio project, app -> res -> values -> strings.xml, as shown in below code
<string name="app_name" translatable="false">CashBack King</string>
How to change app icon or logo in Android Studio?
Click Here to Watch a Video or View Documentation
How to enable google and facebook or other login in firebase console
Click on read documentation or watch a video here.
How to replace google-services.json file
You can replace google-services.json file in Android Studio click here to watch YouTube Video
How to Manage SMTP main Configuration in Admin Panel
Used for sending emails to users directly from the admin panel.
Go to admin panel -> Settings -> Manage SMTP Setting
NOTE: You have to set less secure apps access your account enables and 2-factor authentication on Less secure apps – Google Account please go through this Link Click Here
Default config details for Gmail SMTP
G-mail SMTP Host: smtp.gmail.com
G Email: [email protected]
Gmail id Password: xxxxxx
SMTPSecure(TLS) – Port No.: 587
SMTPSecure(SSL) – Port No.: 465
Important For Gmail SMTP
If you are using Gmail SMTP then you will need app password which is differ than the your Gmail password. Click on the below link to watch a video tutorial.
How to Generate App Password From Gmail id, Used for Admin Panel to Send Emails or OTP to Users
How to Setup AppLovin MAX Mediation Ads
How to change ads id in the admin panel?
Go to admin panel -> Settings menu -> Ads Setting and then change your ads id. All the ads id are from Applovin Dashboard. Using AppLovin You can addadmob, facebook, unity, adcolony, etc ads network easily. Watch above video.
And Also add Admob and Applovin API Keys in the Android studio project otherwise you will get sync error. Watch the above video.
Add admob app id in the String.xml file as shown in the below image on line number: 4
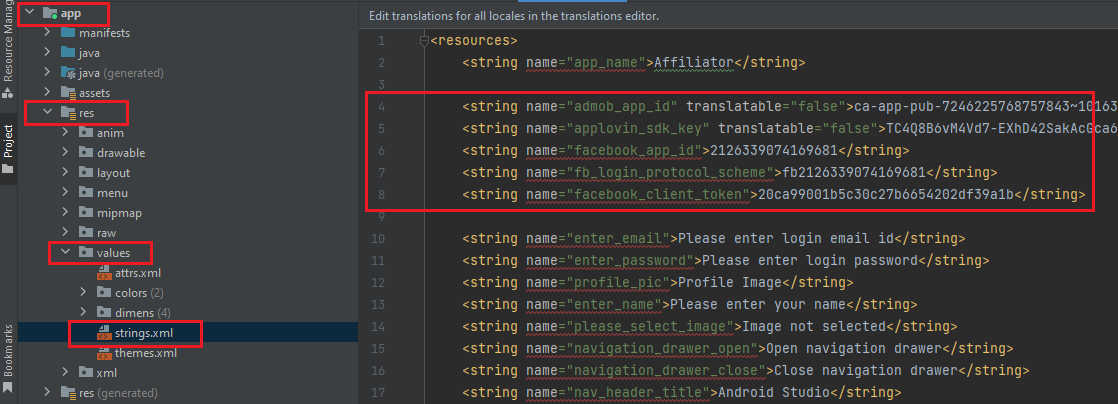
And also change AppLovin Ad Review Key in the gradle file as shown in the screenshot:

How to change One Signal Notification API Key in the Admin Panel and In Android Studio?
Click here to create one signal app id.
Register on it and add your app and firebase details.
After adding app you will get API Key and Secret Key
Add your API Key and Secret Key in the Admin Panel -> App Notification, as showon in the below screenshot:
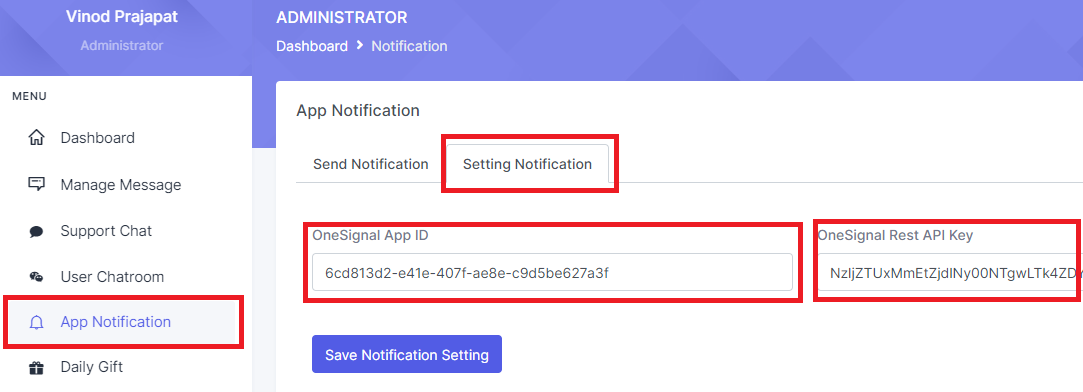
And Now Save it.
For Android App Open Android Studio -> Then Open app -> java -> your package name – > include -> Constant
As showing in the below image:

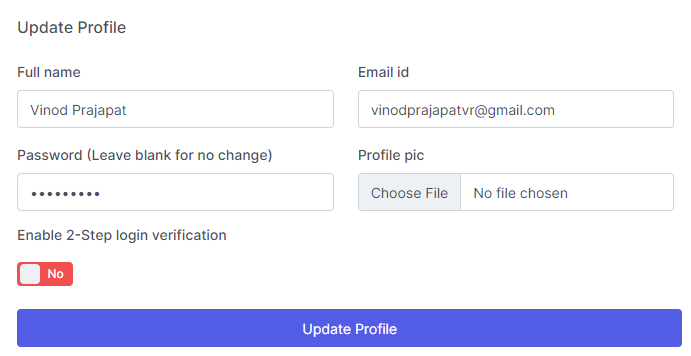
How to change admin login details?
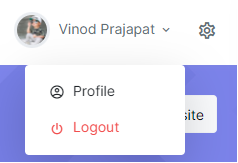
Login in to admin panel with defalt email id and password,
then click on the top right corner as shown in the below image, then choose profile.
How to Manage users in admin panel?
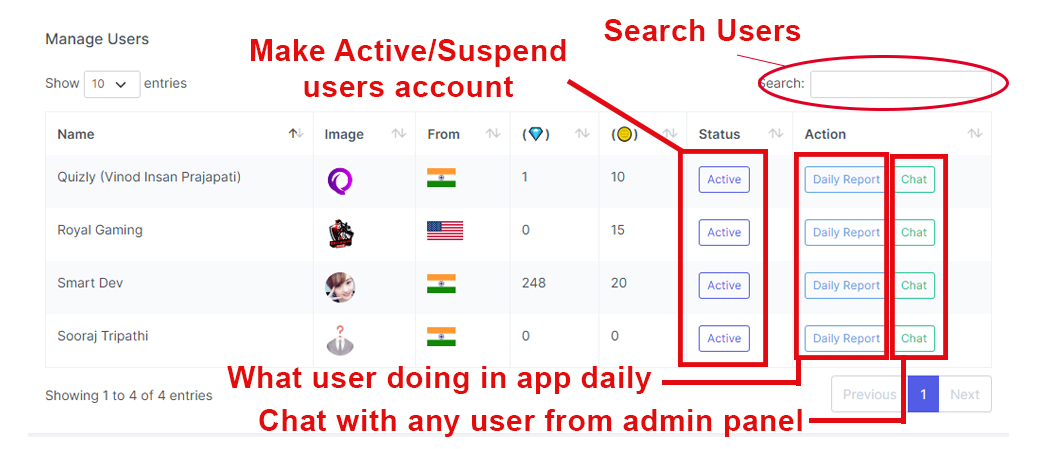
You can search users with name, chat with them, check their earning report date wise, and also make active or suspend user account.
Important Note:-
We have explained everything, yet if anything is remaining you can ask us via our support team website.
Click here to create a support ticket: https://krishnaapps.com/my-tickets/ After register create your ticket, when your number comes we will respond you as soon as possible.
Do not forget to read support policy in the item description on Envato.
Thanks


